| HOME | Pictures | Links | Events | Forum | CONTACT US |
| League Home |
| Scores |
| Schedule |
| Forum |
Coach's Corner Lesson 4 |
|
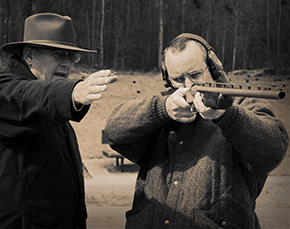
Click here for Lesson 1, Lesson 2, Lesson 3 One of the most difficult items for experienced shooters to over come in Trap is the understanding of Gun Control. The resolution of this problem is very simple on paper it requires the application of a few basic skills working together. First we will address the role of the RIGHT HAND (yep, the other one if your left handed) and the fact that it is ‘the most critical element in control of the gun.’ The items it controls include mounting the gun to the shoulder at the exact same place so that the dominate eye is in the exact same position in relationship to the gun (yes, beads, ribs, barrel and zone the target will appear.) The hand that occupies the forward position on the ‘forearm’ is just there for support of the weight, NOT TO AIM THE SHOTGUN. Yes, that is one of the best kept secrets in all of the shotgun world. The sooner you learn to ‘Lock Yourself’ in to the gun, the more fun you will begin to have breaking targets. Your right hand, face, chest and a combination of pulling back with your right hand and leaning into the gun with your chest is how the gun is ‘locked in place.’ In the previous Coach’s Corner we reviewed how critical gun fit, gun mount and visual contact is in this game, now we need to begin to tie the various parts into a working model. To accomplish this we need to throw in a little information about foot position and posture. Briefly, keep your heels no more than 6-12 inches apart, usually with the forward foot pointing toward the trap house (12:00 on our clock face) and the rear foot pointed toward 3:00. The weight can be placed on the front foot in various amounts that can range from 80% down to 50%. Some people break their forward knee and others keep both straight. That is where you must work at the game and LEARN what is best for your body style and comfort. British World Champions stand erect and are very precise and others from around the world vary from that straight up and down posture, some have a slight forward lean (3-6%) and some forward shift of their weight. Lock the machine on straight-a-way targets and stand at station 3 and sort this out for yourself. If it gives you more gun control or more smoke that is moving you into the right area. Now we are moving back to our assembly of a workable shooting package for you to develop around your style of shooting. From the beginning of the article I have tried to make you aware of the importance of the right hand. The distance of the hand from the trigger and the angle of the wrist are important items for gun control but are seldom sales factors except in bespoke guns. Since you probably already own your gun what you need to look for is the way the trigger finger is situated on the trigger; you want it to touch the crease in the first joint, NOT just the pad. Your thumb should be able to go over the top of the grip so you actually are using it to hold the gun. The bottom three fingers apply the pressure to pull the gun into your shoulder. When this grip allows you to mount your gun correctly the lock up between the face, chest and hand will hold the gun up without the supporting hand touching the gun. The left hand can be mounted several ways, but the ‘correct and prescribed‘ manner is with the forearm laying across your hand, running from just above your wrist and between your thumb and forefinger. It is best to hold this grip lightly but again see what works best for you. If you have a very fast target move the hand closer to the receiver, for very precise control you can move it forward as far as comfortable. In general most shooters put there hand in the position that best fits their shotguns weight and achieves a comfortable balance point.
|